Portable Wifi Monitor in Swift on Raspberry Pi

As I wrote about recently, I have been hacking on Raspberry Pi recently, using Swift. I got a bunch of parts from Adafruit today, and decided to attack a new project.
The Problem
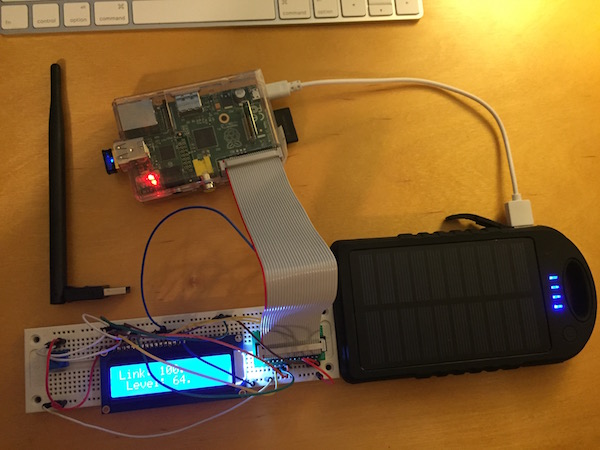
I have several ideas for the summer…monitoring my record collection in the basement for humidity & temperature, monitoring the garden outside for light, temperature, etc, doggie cam… However, one thing many of these projects have in common is that I need two things: power and wifi. I’ll discuss long term portable power in the future, but for now, I just got a cheap “solar” battery, made for phones. Works good, and lets me charge and use the battery, so I can unplug the Pi and move it without rebooting.
That leads me to wifi. Unfortunately my wifi is not strong everywhere. I am trying different tweaking of the setup & also using different wifi adapters for the Pi, all to mostly test range. But how do you easily test this? How “good” is your wifi?
Thats the issue: how to measure my wifi.
Unix
I did some Googling and found that one simple file seemed to show the information I wanted, so seeing the output was as simple as:
pi@raspberrypi:~ $ cat /proc/net/wireless
Inter-| sta-|   Quality        |   Discarded packets               | Missed | WE
 face | tus | link level noise |  nwid  crypt   frag  retry   misc | beacon | 22
 wlan0: 0000  100.   77.    0.       0      0      0      0      0        0
This file is updated realtime, so all I have to do is get this link/level data into a program, and out onto a portable screen!
The Build
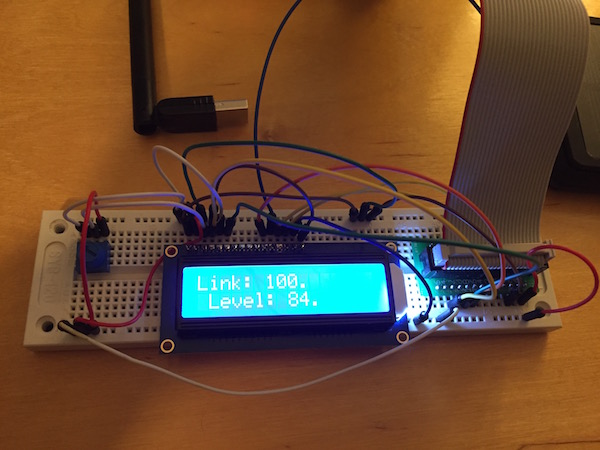
The main part I used was the HD44780 16x2 blue LCD from Adafruit. I cheated and got the assembled one, so i didn’t have to solder the header on.
I mostly followed this tutorial for how to wire the LCD to the Pi. Basically you just need the LCD, a pot (comes with LCD), a cobbler, breadboard and wires.
I am not that experienced with this stuff (learning!), so I initial had some trouble with my breadboard, but it didn’t take long to get it up and working.
The Software
Once I had things wired, it was time for coding. I knew I wanted to do everything in Swift. Seriously, RaspberryPi people, enough with the Python. 😀
I have a basic Swift setup on my Pi that I described in my previous post. Plus, the author of SwiftyGPIO also has a project for the HD44780!
My Code
I had to change some of the pins, but was able to get testing output going to the LCD easily enough:
1
2
3
4
5
let gpios = SwiftyGPIO.getGPIOsForBoard(.RaspberryPiRev2)
let lcd = HD44780LCD(rs:gpios[.P25]!,e:gpios[.P24]!,d7:gpios[.P22]!,d6:gpios[.P27]!,d5:gpios[.P17]!,d4:gpios[.P23]!,width:20,height:4)
lcd.clearScreen()
lcd.cursorHome()
lcd.printString(0,y:0,what:"Hello",usCharSet:true)
Now the tricky bit. At first, I tried to read the /proc/net/wireless file directly from Swift. I tried everything, all with no success. I think maybe it is just a weird system file that can’t be read directly? Or maybe the support just isn’t there in the Linux Foundation classes for Swift? Not sure.
Then I tried using my PiRunner code from last post to pull out the data I needed using the commandline. This worked good, but I couldn’t figure out how to get stdout from the run command to save to a variable inside my code. Normally, this would be done by assigned a NSPipe to the NSTask, but it doesn’t look like this functionality is available yet in NSTask.
SO…. I settled on kind of a hack solution. I re-route the file to a local file, then read the local file into my code, and parse out the data there:
1
2
3
4
5
6
7
8
9
10
11
12
13
14
15
16
17
18
19
20
21
22
23
24
25
26
27
28
29
30
31
32
33
34
import Glibc
import Foundation

func initLCD() -> HD44780LCD {
	let gpios = SwiftyGPIO.getGPIOsForBoard(.RaspberryPiRev2)
	let lcd = HD44780LCD(rs:gpios[.P25]!,e:gpios[.P24]!,d7:gpios[.P22]!,d6:gpios[.P27]!,d5:gpios[.P17]!,d4:gpios[.P23]!,width:20,height:4)
	return lcd
}


while (true) {
	print("updating...")
	// weird i can't read this file directly
	PiRunner().shell("cat /proc/net/wireless | tail -n1 > outfile")

	do {
		let text = try NSString(contentsOfFile: "outfile", encoding: NSUTF8StringEncoding)

		let link = text.substringWithRange(NSRange(location: 14, length: 5))
		let level = text.substringWithRange(NSRange(location: 21, length: 5))

		let lcd = initLCD()
		lcd.cursorHome()
		lcd.clearScreen()

		lcd.printString(0,y:0,what:"Link: \(link)",usCharSet:true)
		lcd.printString(0,y:1,what:"Level: \(level)",usCharSet:true)
	} catch (_) {
		print("caught errrer")
	}

	sleep(1)

}
And that works!

While slightly clunky, I can walk around with this and test the wifi throughout my property, with different Wifi setups!
All my code for this project is available here.